Lupine Publishers Group
Lupine Publishers
Menu
ISSN: 2641-6921
Research Article(ISSN: 2641-6921) 
Impact of Low Frequency Vibration During Welding and Annealing on Microstructure of Mild Steel Butt-Welded Joints Volume 3 - Issue 3
Abere Dare Victor1*, Oyatogun Grace Modupe2, Oluwasegun Kunle Micheal2, Ojo Sammy Alaba3 and Adeosun Adebayo Samuel2
- 1Department of Metallurgy, National Metallurgical Development Centre, Jos Nigeria
- 2Department of Materials Science and Engineering, ObafemiAwolowo University Ile-Ife, Nigeria
- 3Department of Mechanical Engineering, University of Akron, Akron, USA
Received: September 18, 2020; Published: October 09, 2020
*Corresponding author: Abere Dare Victor, Department of Metallurgy, National Metallurgical Development Centre, Jos Nigeria
DOI: 10.32474/MAMS.2020.03.000162
Abstract
This work examined the Impact of Low Frequency Vibration during Welding and Annealing on Microstructure of low carbon steel Butt-welded Joints with a view to establishing vibration regimes and the resultant microstructures that may improve the condition of service performance as well as increasing life span of welded joints. Commercially available mild steel plates were butt-welded employing vibration and non-vibration welding conditions and subjected to heat treatment before carrying out metallographic analysis. Vibration frequencies were varied from 0 to 14.32Hz in three different steps.The mechanical performance of the weldment with reference to strength and toughness depend upon the type of microstructure of weld metal and heat affected zone. The post weld heat treatment of annealing and stress relieving tend to significantly reduce the incidences of the conditions highlighted above. Also, rearrangements and realignments of the grains especially at the weld zones are obvious and have greatly influenced the quality and properties of the welded joints. It was observed from the vibrated frequencies 7.96Hz and 14.32Hz that the grain size diameters are coarser in the non-heated samples than the annealed samples in all the investigated zones. Hence, the vibration treatment during welding and casting greatly influence microstructures and improves grain refinement and service performance of the butt-welded joints.Results of microstructure analysis indicates fine-grained sizes at weld zones; but coarse at the heat affected and base metal zones, respectively. Therefore, microstructures having finer grain sizes are known to possess good mechanical properties with consequential effect on fracture toughness.
Keywords: Butt-Welded; Grains; Microstructure; Coarse; Weldment; Annealing; Vibration
Introduction
As a result of the availability, ease of fabrication, cost, good mechanical properties, and weldability of Low carbon steel; it has found diverse applications in transportation, marine, mining, chemical processing, pipelines, construction, and metal-processing equipment. Most of the engineering components are being joined through various techniques which include welding, fastening, riveting, brazing. However, welding process has been adopted for several manufacturing processes to minimize manufacturing time, achieve weight reduction, improve mechanical attributes and to ensure permanent joint [1]. Welding is essentially a metal joining technique. A weldment can be grouped into three distinct zones which are weld metal zone (WMZ), heat affected zone (HAZ) and the unaffected base metal zone (UBMZ). For low carbon steel which is the most welded material the three zones of a weldment can be indicated in an iron carbon equilibrium diagram [2].The fusion zone which is the volume of the parent metal melted to form part of the weld metal zone or the weld head lies between the WMZ and HAZ [3].The weld metal zone is formed by the solidification of the weld pool which itself is formed by the melting of a part of the parent metal and the additional material that is contributed by the melting of the electrode when used. In welding, however, there is a gradual change in temperature from the center of the weld pool to a short distance away from it, solidification of the molten metal in the weld pool starts as soon as it reaches the liquidus temperature for that material composition [3]. It requires no undercooling as the party melted grains provide the nuclei where from the growth of grains start into the solidifying weld pool, such a mode of solidification is referred to as Epitaxial solidification [2].
Properties most required of weld metal are toughness and strength. In general strength and toughness of the weld metals do not match those of corresponding base on parent metal. The ratio of yield strength to ultimate tensile strength is always higher in weld metal than in base metal [4]. Properties of weld metals are greatly influenced by the type of microstructure, grain size, precipitation processes, ageing, etc. in a similar vein; microstructure can be affected considerably by welding parameters like welding speed, heat input, etc. Toughness properties of weldments are worse than those of rolled or forged steels, in addition to strength and toughness, weldments are also required to have good fatigue properties [5]. In general fatigue properties of weld metals are interior to those of corresponding base metals. Because fatigue properties are affected mainly by weld contours as well as by morphology and dispersion patterns of inclusions. Therefore, to obtain good fatigue properties, weld metals must be sufficiently pure. Also, because of a lower carbon content it welds metal in comparison with that in the steel forming the HAZ and the base metal, the creep strength of the weld metals is always lower. Therefore, it can be said that the weld metal properties are affected not only by the chemical composition of the filter material used, but also by the chemical composition of the steel used as the parent material, the welding process employed and the weld cooling rates [6].A heat affected zone of a weld is that part of the welded joint which has been heated to a temperature up to the solidus of the parent material resulting in varying degree of influence on microstructure as a consequence of heating and cooling cycle [7]. When metal and alloys without polymorphous transformation (e.g. Cu, Ni, Ai) are welded, the microstructure in the HAZ remains unaltered though grain growth or recrystallization may take place while in the case of metals and alloys with polymorphous transformations (e.g. steels), significant micro structural changes take place in HAZ, that in turn influence the mechanical properties and consequently the service behaviour of the welded joint [5].This study therefore seek to investigate the effectof low frequency vibration during welding and annealing on microstructure of mild steel butt-welded joints of low carbon steel with a view to establishing vibration regimes and the resultant microstructures that may improve the service performance andincrease thelife span of welded joints.
Method
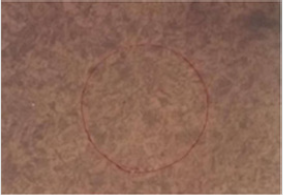
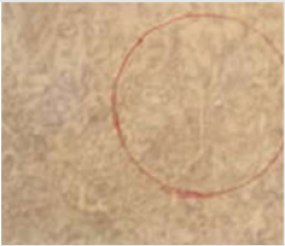
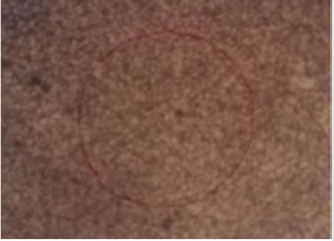
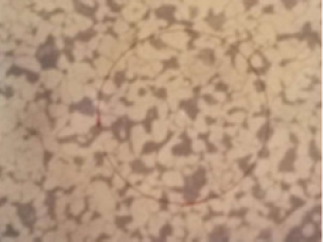
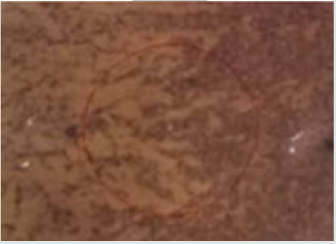
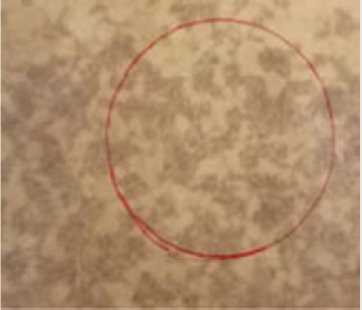
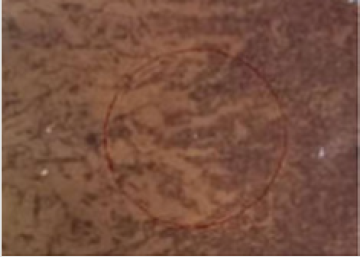
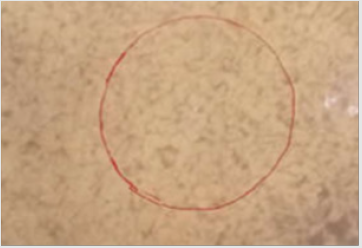
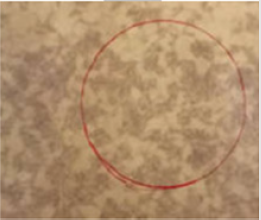
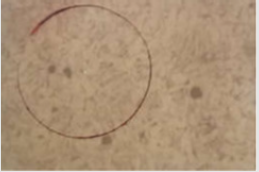
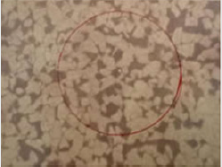
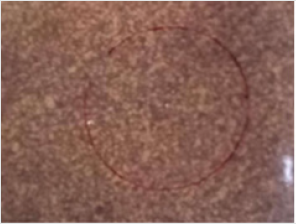
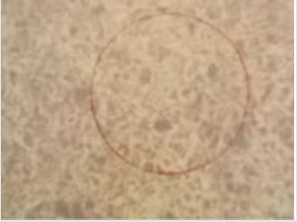
Butt-welded joints of O Hz, 7.96 Hz and 14.32 Hz were made up of three distinct zones such as parent metal, heat affected zone and weld zone. From each sample, sections were obtained using manual hack sawing which were representatives of all the segments of the samples. Because the specimens were small, hence they were mounted to facilitate rough grinding as well as intermediate and final polishing. Each extracted sample was ground using silicon carbide belt grinders of finer silicon carbide with grits of 240, 320, 400 and 600 meshes. Final grinding was carried out with 1000 grit size silicon carbide grinder. Each sample was then polished using Magnesium Oxide (MgO) powder. The mirror-like blower was dried using an electric blower and etched using a solution composed of Nital 2% (that is 2% Nitric Acid and 95% methyl alcohol). Etching revealed the different welded zones when viewed under the optical microscope and with the aid of the digital camera mounted on the microscope, the photomicrographs of the various structures were obtained. For the grain size measurement, the circular intercept method was employed whereby a circle of diameter 79.8mm was drawn on each micrograph representing the three zones of the weld joints. This circle was counted and added to ½ the intersecting grains. The number was then further translated as an average grain diameter of each photomicrograph. This was determined for all the weld zones and heat affected zones (HAZ) respectively
Results and Discussion
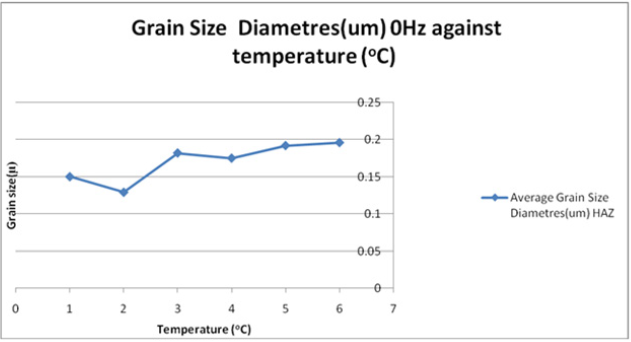
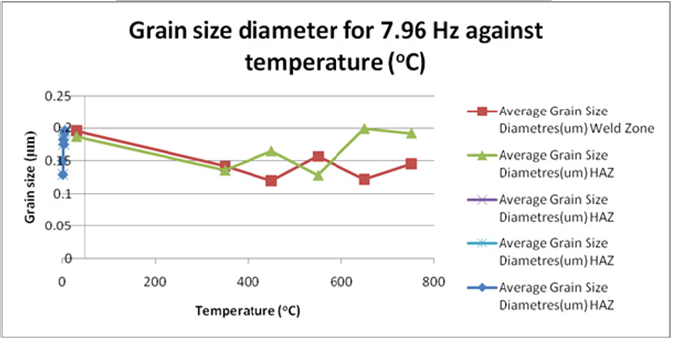
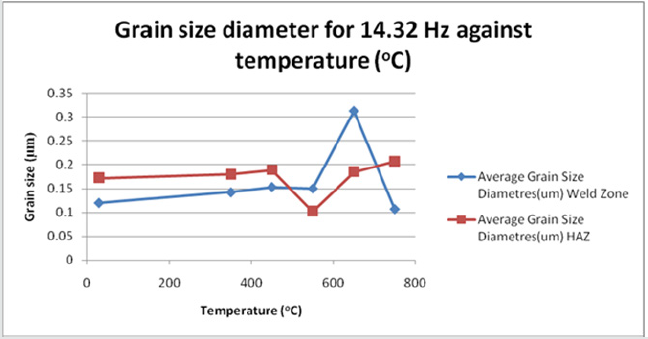
Results of microstructure analysis are presented in plates 1 -15 while the grain size diameters at different vibrations are presented in (Figures 1-3) and Table 1 Discussion
Microstructure of Samples Vibrated at 0Hz Frequency
Weld Zone (Non – heat treated sample): The microstructure
consists of light areas and dark areas. The light areas represent
ferrite while the dark areas represent pearlite grains. Generally,
the structure is that of chunky pearlite in partially transformed
zone. Etching reagent of 2% Nital was used at 250X magnification.
For the heat affected zone of the non-heat-treated samples, the
microstructure was etched in 2% Nital at 250X magnification. There
is distribution of fine pearlite grains as dark spots in a martensitic
matrix. There is also the presence of small white undissolved carbide
spheroids in dark pearlite areas. The weld zone annealed at 3500C
reveals a fine dispersion of pearlite, otherwise called alloy carbides
in a matrix of ferrite grains. The ferrite grains occupy the light
back-ground. The microstructure was etched in 2% Nital solution
at 250X magnification. Heat affected zone annealed at 3500C,
the sample was welded under normal welding condition without
application of vibration frequency. The microstructure etched
in 2% natal consists of polygonal ferrite and acicular ferrite. The
dark areas connote pearlite. The structure reveals that the cooling
was slow as the sample was cooled in the furnace which resulted
in tempered bainite [8]. The weld zone produced under normal
welding condition and heat treated at 4500C was slowly cooled
in the furnace. The structure consists of fine-grained pearlite and
ferrite signs of non-metallic inclusions seen as dark cuts. Etching
solution of 2% natal was used at 250X magnification. For the heat
affected zone at the same heat treatment temperature and under
the same welding condition, large pearlite and ferrite grains can be
observed together with the evidence of grain growth.
The structure was etched in 2% natal at 250X magnification.
The weld zone heat treated at 5500C and under the same welding
condition of 0Hz frequency consists of fine ferrite grains which
are depicted in white areas with equal amount of pearlite grains
which are in dark areas (Figure 1). The presence of large dark
spots indicates inclusions. It is also an indication that the weld
was defective. The heat affected zone at the same temperature
of 5500C shows tempered bainite with some proeutecoid ferrite.
More equiaxed light gray constituents can also be observed in the
sample [9]. The structure was revealed when etched in 2% natal
at the magnification of 250X. The weld zone heat treated at 6500C
under the same welding condition largely contain sepitacial grain
structure; acicular or lower bainite; and black needles in a martensic
white matrix etched in 2% natal and at 250X magnification. At the
same annealing temperature of 6500C, the resulting microstructure
is that of spheroidized carbides in a ferrite matrix. The structure
was etched in 2% natal. The weld zone heated at 7500C, furnacecooled
to room temperature and treated to no vibration frequency
showed a structure of the fine spheroidal cementite in a matrix of
ferrite. The heat affected zone on the other hand clearly showed
grain growth zone. The microstructure consists of pearlite carbides
prominent within the soft ferrite matrix.
Microstructure of Samples Vibrated at 7.96Hz Frequency
The weld zone produced at 7.96Hz vibration frequency has a
structure of epitaxial long grains with large dark spots occasioned by
welding defects (Figure 2). As a result of the vibratory treatment, the
grains are more aligned. The microstructure consists of long ferrite
grain with dark boundary edges. The heat affected zone consists
of ferrite and pearlite grains. Large white portions represent the
ferrite grain while the dark portions represent the ferrite grain while
dark pearlite grains. The microstructure was etched in 2% nital
at 250x magnification. The weld temperature of 3500c under the
vibratory condition of 7.69Hz frequently showed a fine dispersion
of carbide in ferrite matrix. The light areas are ferrite grain whereas
the dark areas are pearlite grains [10]. Etching reagent used is 2%
nital at 250x magnification. For the heat treatment temperature of
3500c, the microstructure consists of pearlite-ferrite grains. The
appearance of the structure depicts tempered martensite. At 4500c,
the weld zone has a structure of refined equiaxed grain. There are
no contaminants in the structure. The weld joint is sound etched
in 2% nital, the heat affected zone at 7.69Hz vibration frequency and 4500c heat treatment temperature has a structure consisting
of pearlite and ferrite with pearlite scattered in ferrite matrix. The
microstructure does not significantly change from the structure
of the base metal. Both ferrite and pearlite are evenly distributed.
Etchant of 2% nital was used. The weld zone heat treated at 5500C
and at the same vibration has a structure of ferrite and cementite.
The cementite grains became elongated with maximum ductility
and minimum hardness with reduced machinability [6].
On the other hand, the heat affected zone consists of fine-grained
ferrite and pearlite of spheroidal shapes. The heat affected zones
in a most of the residual and welding stresses have been removed.
The microstructure was etched in 2% initial. The weld zone heated
to austenitizing temperature and annealed below sub-critical
temperature consists of fine-grained ferrite and small pearlite
areas. The structure has good impact toughness and strength but
moderately hard, the heat affected zone at same temperature of
6500C consists of coarse grains of ferrite and pearlite with the
pearlite zones subsumed in ferrite matrix. The weld zone heat
treated to 7500C and vibrated at 7.96Hz welding frequency showed
spheriodized cementite in ferrite matrix. All microstructure was
studied using 2% nital as etchant and at the magnification of 250X.
The heat affected zone slightly experienced thermal cycle from
fusion zones. The microstructure basically consists of pearlite and
ferrite but with large sizes of pearlite grains [11].
Microstructure of Samples Vibrated At 14.32hz Frequency
The microstructure for non-heat-treated samples showed equiaxed ferrite grain of a homogenous nature with pearlite patches within the matrix (Figure 3). The heat affected zones also contains pearlite and ferrite, grains of pearlite particles are coarse with pearlite being distributed in ferrite matrix. The structure is not distinct from the base metal structure. At 3500C heat treated temperature the microstructure consists of dense and massive ferrite grains with pearlite at the edges of the ferrite grains. In the heat affected zones on marked microstructural changes recorded. The structure cooled slowly to coarse grains of ferrite and pearlite while dark areas are pearlite. The weld zoneheat treated to 4500C consist of tempered martensite whereasthe heat affected zone has a structure of fine lamellar pearlite and ferrite the hardness of the base metal and the structure is not remarkably different from the original structure [11]. The weld annealed at 5500C and cooled in furnace also consists of pearlite and ferrite with some spheroidal cementite [7]. The heat affected zones annealed at sub-critical temperature of 6500C consists of equiaxed ferrite grains with signs of entrapped gases.Black spots are alloy carbides with matrix of ferrite. The microstructure of the heat affected zone consists of ferrite and pearlite. The grains are large on sizes but shows portions of fine grains towards the unheated zone [10].
Effect of Vibration and Heat Treatment on Microstructure
The microstructure of the three zones were studied for all the specimens vibrated at frequencies of 0, 7.96 and 14.32 and annealed at temperatures 3500C–7500C (Plates 1-15). The specimens were initially subjected to moderate vibration frequencies of 0, 7.96 and 14.32 Hz. A common phenomenon of the microstructures studied was the presence of pearlite in ferrite matrix. At 0Hz the grains at the base metal and heat affected zone are coarser than at the moderately higher frequencies of 7.96 and 14.32Hz at the same zones. Grain sizes at the weld zones are more refined which may improve quality and performances of welded joints. Most grains are equiaxed and spheroidal at weld zones. The grain sizes of the weld zones are often evenly distributed with massive grains of pearlite and ferrite whereas coarse grains are observed in the structure of the base metal and the heat affected zones [7].Mostly the grains are fine at the weld zones. Under the normal welding condition, the grains of the non-heat-treated samples are of finer grain sizes than the heat-treated samples with respect to the weld zones and the heat affected zones. But at the moderately vibrated frequencies 7.96Hz and 14.32Hz the grain size diameters are coarser in the nonheated samples than the annealed samples in all zones studied. The study has indeed shown that vibration treatment during welding and casting can greatly influence microstructures and generally improves grain refinement and service performance of the buttwelded joints [12-15].
Effect of Vibration and Heat Treatment on Grain Size
For most steels, the grain size of the microstructure is a strong determinant of notch toughness Table 1. Vibratory treatment has been shown to improve grain refinements [6]. As a result, the grain size has marked influence on the yield stress, and strain hardening rate and it is therefore logical to expect grain size to influence fracture toughness. Therefore, microstructures having finer grain sizes are known to possess high mechanical strength with consequential effect on fracture toughness [11].
Conclusion
The heating and cooling cycles of welding result in the development of residual stresses. The residual stresses developed due to welding being a combination of tensile and compressive stresses. Different welding processes result in different rates of cooling with consequential effect on microstructure, grain size and residual stresses. A high cooling rate process like EAW results in fine-grained weld zone of high hardness and strength, but with low impact strength. The post weld heat treatment of annealing and stress-relieving tend to significantly reduce the incidences of the conditions highlighted above. On the other hand, a low cooling rate process like submerged arc welding results in comparatively coarser-grained weld zone of medium hardness and strength with high fracture toughness. As the weld zone and HAZ have different hardness so is their tendency to brittle fracture which is a major function of the composition of the microstructure that influences the mechanical properties of the weld metal[16-19].
References
- Xu Z, Lu P, Shu Y (2016) Microstructure and fracture mechanism of a flash butt welded 380CL steel- Engineering Failure Analysis. Elsevier 62: 199-207.
- Garcia CI, Al-Hajeri K, Hua M (2009) Particle stimulated nucleation of ferrite in micro-alloyed steel. In Materials Science and Technology (MST&TO9), Steel Processing, Pro- duct and Applications Symposium, Pittsburgh, PA 25-29.
- Gunduz, S, Cochrane RC (2005) Influence of cooling rate and tempering on precipitation and hardness of vanadium micro-alloyed steel. Materials and Design 26(6): 486-492.
- Ichiyama Y, Saito T (2004) Factors affecting flash weldability in high strength steel–a study on toughness improvement of flash welded joints in high strength steel-Welding international. Taylor &Francis 18(6): 436-443.
- Ojo Alaba Sammy, Abere Dare Victor, Oyatogun Grace Modupe, Oluwasegun Kunle Micheal, Adeosun Adebayo Samuel (2019) Influence of Vibration and Heat Treatment on Hardness and Impact Toughness on Low Carbon Steel Butt-welded Joints. J International Journal of Materials Science and Engineering 2(1).
- Mandal S, Tewary NK, Ghosh SK, Chakrabarti D (2016) Thermo- mechanically controlled processed ultrahigh strength steel: microstructure, texture and mechanical properties-Materials Science and Engineering-Elsevier 663: 126-140.
- Oladele, Isiaka Oluwole, Adewuyi, Benjamin Omotayo (2019) Performance Evaluation of the Effects of Post Weld Heat Treatment on the Microstructure, Mechanical and Corrosion Potentials of Low Carbon Steel-Advanced Technologies & amp. Materials 44(1).
- Shajan, Nikhil, Arora, Kanwer Singh, Asati, Brajesh, et al. (2018) Effects of Post-Weld Heat Treatment on the Microstructure and Toughness of Flash Butt Welded High-Strength Low- Alloy Steel. Metallurgical and Materials Transactions A 49: 1276-1286.
- Räsänen AN, Martikainen J (2011) Experimental review of metallurgical flash weld defects in welded joints: essence of flat spots, penetrators and oxide inclusions- Science and Technology of Welding. Taylor & Francis 16(6): 471-476.
- Xi C, Sun D, Xuan Z, Wang J, Song G (2016) Microstructures and mechanical properties of flash butt welded high strength steel joints- Materials & Design. Elsevier 96: 506-514.
- Jonas JJ (2009) In Microstructure and Texture in Steels and Other Materials. A Haldar, S Satyam, B Debashish (Eds.), Springer, London, USA p 3-17.
- Yin N, Meng XT, Li F, Cui Y, Zhou ZW (2014) Cracking analysis of automobile rim flash butt welding- Advanced Materials -Trans Tech Publ.
- Bhattacharyya S, Adhikary M, Das MB (2008) Failure analysis of cracking in wheel rims– material and manufacturing aspects-Engineering Failure. Elsevier 15(5): 547-554.
- Parmar RS (2007) Welding Engineering and Technology. KHANNA Publishers, India.
- Polakowski NH, Ripling, FJ (1999) Strenght and structure of Engineering Materials, Prentice-Hall, Inc. Englewood Cliffs N.
- Show BK, Veerababu R, Balamuralikrishnan R, Malakondiah G (2010) Effect of vanadium and titanium modification on the microstructure and mechanical properties of micro alloyed HSLA steel. Material Science and Engineering A 527: 1595-1604.
- Tawfik D, Mutton PJ, Chiu WK (2008) Experimental and numerical investigations: Alleviating tensile residual stresses in flash-butt welds by localized rapid post-weld heat treatment-Journal of materials processing technology, Elsevier 196(1-3): 270-291.
- Zhang D, Terasaki H, Komizo Y (2010) In situ observation of the formation of intragranular acicular ferrite at non-metallic inclusions in C–Mn steel- Actamaterialia Elsevier 58(4): 1369-1378.
- Raveendra J, Parmar RS (2000) Mathematical Models to predict Weld bead geometry from Flux Cored Arc Welding Metal Construction (19).

Top Editors
-

Mark E Smith
Bio chemistry
University of Texas Medical Branch, USA -

Lawrence A Presley
Department of Criminal Justice
Liberty University, USA -

Thomas W Miller
Department of Psychiatry
University of Kentucky, USA -

Gjumrakch Aliev
Department of Medicine
Gally International Biomedical Research & Consulting LLC, USA -

Christopher Bryant
Department of Urbanisation and Agricultural
Montreal university, USA -

Robert William Frare
Oral & Maxillofacial Pathology
New York University, USA -

Rudolph Modesto Navari
Gastroenterology and Hepatology
University of Alabama, UK -

Andrew Hague
Department of Medicine
Universities of Bradford, UK -

George Gregory Buttigieg
Maltese College of Obstetrics and Gynaecology, Europe -

Chen-Hsiung Yeh
Oncology
Circulogene Theranostics, England -
.png)
Emilio Bucio-Carrillo
Radiation Chemistry
National University of Mexico, USA -
.jpg)
Casey J Grenier
Analytical Chemistry
Wentworth Institute of Technology, USA -
Hany Atalah
Minimally Invasive Surgery
Mercer University school of Medicine, USA -

Abu-Hussein Muhamad
Pediatric Dentistry
University of Athens , Greece

The annual scholar awards from Lupine Publishers honor a selected number Read More...


